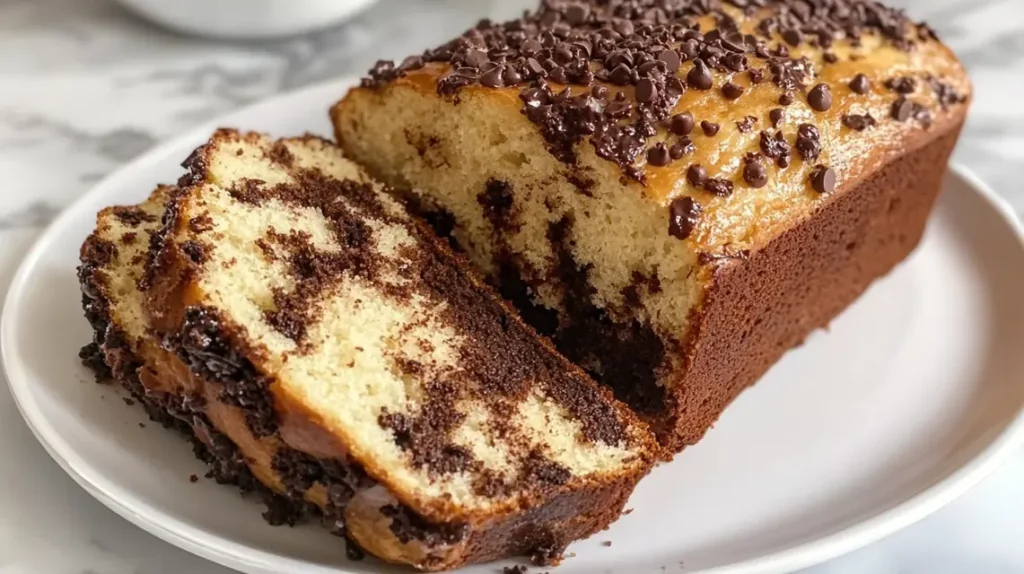
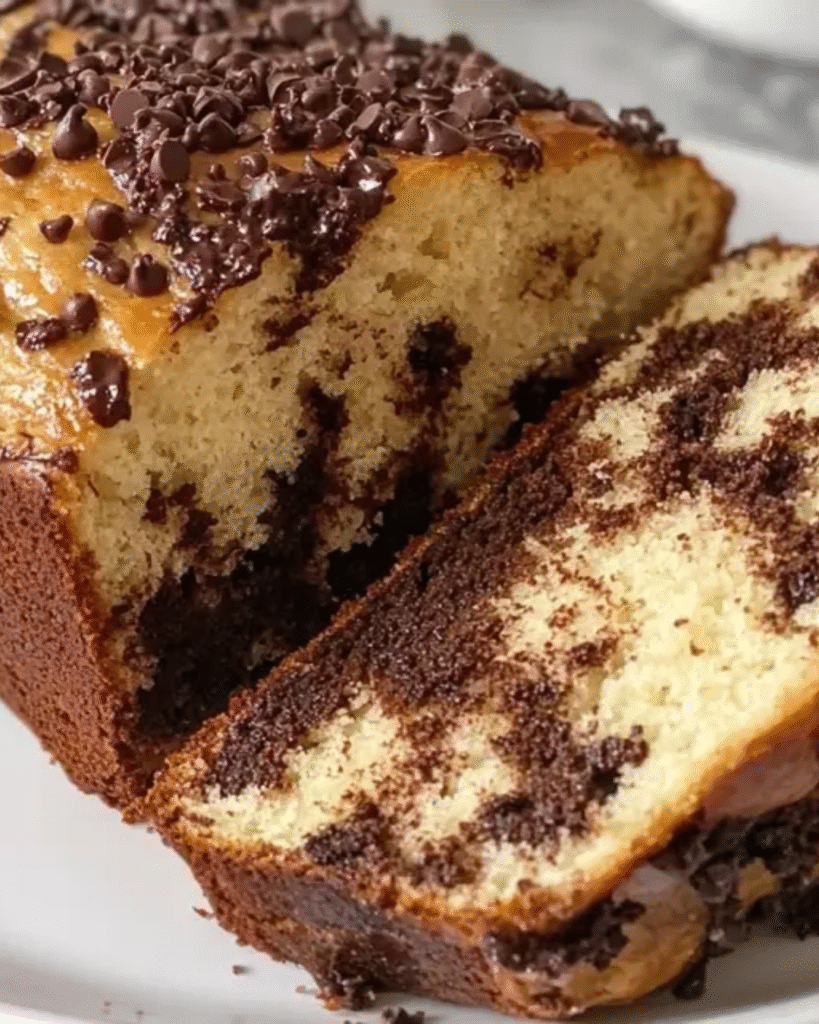
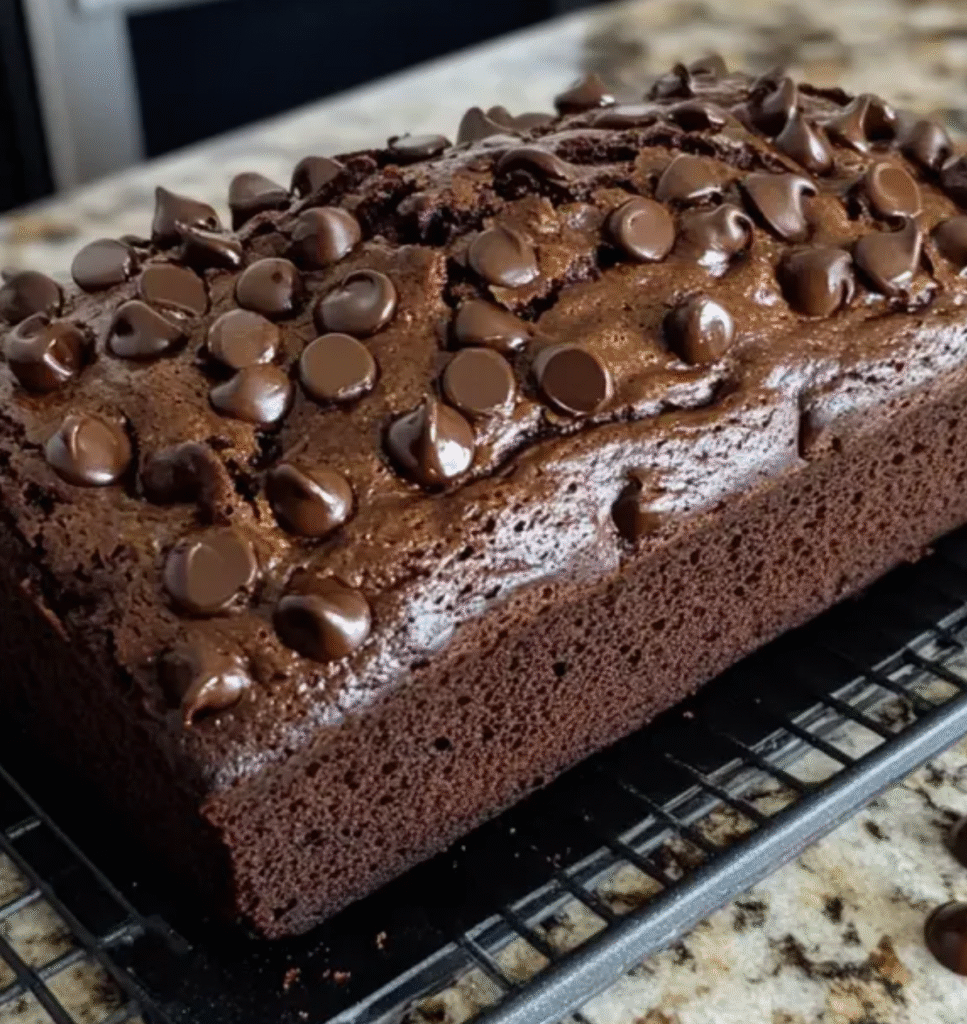
Okay, hear me out chocolate bread. Not cake, not brownies, but actual bread that’s soft, rich, and packed with chocolatey goodness. It’s like your favorite loaf of bread and a bar of dark chocolate had a love child. Perfect for breakfast (because chocolate for breakfast just hits different), dessert, or an afternoon snack with a hot cup of coffee. Honestly, this recipe is dangerously good one slice turns into two or three…

Discover a moist, rich chocolate bread recipe with simple steps and irresistible flavor. Enjoy every slice fresh from your own kitchen.
Why Try This Chocolate Bread Recipe Today?
This chocolate bread recipe brings comfort and delight to every table. Moreover, it offers a nostalgic aroma that can warm your home. Generally, people think of bread as savory. However, this version proves bread can also be sweet and indulgent. Because of its unique blend of chocolate and yeast, it stands apart from ordinary loaves. In fact, this treat appeals to families, kids, and dinner guests alike.
Furthermore, the subtle sweetness in this loaf contrasts wonderfully with bitter cocoa notes. Equally important, it pairs well with your morning coffee or afternoon tea. Comparatively, the effort you invest in making it pays off abundantly with each tender slice. Additionally, the recipe uses common pantry items, ensuring convenience and accessibility.
Basically, this loaf serves as a fun weekend baking project. Consequently, many home bakers find joy in experimenting with chocolate-infused dough. Meanwhile, the kneading process relaxes the mind. Eventually, you will achieve a culinary masterpiece. Undoubtedly, this chocolate bread recipe transforms simple ingredients into a mouthwatering delight.
Key Ingredients for Your Chocolate Bread Recipe
Because the right ingredients influence the final result, choose them carefully. Initially, start with fresh yeast or quality instant yeast. Additionally, consider premium cocoa powder for a richer taste. Comparatively, low-quality cocoa may lead to dull flavor notes. Indeed, you want every ingredient to shine.
Essential Ingredients:
- Bread flour (for structure and chewiness)
- Unsweetened cocoa powder (high-quality, Dutch-processed preferred)
- Granulated sugar (to add sweetness)
- Unsalted butter (for richness and tenderness)
- Whole milk (for added moisture and flavor)
- Instant yeast or active dry yeast (for proper rise)
- Salt (to enhance all the flavors)
- Warm water (if needed to adjust dough consistency)
- Optional chocolate chips or chunks (for even more indulgence)
Basically, these ingredients form the foundation of your loaf. Equally, pay close attention to their freshness. Eventually, your careful selection will result in a glorious, tender crumb.
Selecting High-Quality Cocoa for This Chocolate Bread Recipe
Chiefly, the cocoa you choose influences the bread’s flavor depth. Accordingly, opt for a rich, dark cocoa. Likewise, ensure it is unsweetened. Particularly, Dutch-processed cocoa helps maintain a neutral pH, leading to consistent results. Moreover, top-tier cocoa provides a sophisticated chocolate profile. Ultimately, it makes the final loaf taste complex and indulgent.
Step-by-Step Chocolate Bread Recipe Instructions
Now it’s time to transform ingredients into a smooth, workable dough. Consequently, gather your tools before starting. A stand mixer helps, but you can also knead by hand. In any case, keep your workspace clean and organized. Eventually, this will simplify each step. Thus, you will feel confident and inspired.
Basic Steps:
- Activate Yeast:
Initially, combine yeast with warm milk and a pinch of sugar. Wait until it becomes bubbly. Furthermore, ensure the temperature stays around 110°F for best results. - Combine Dry Ingredients:
Subsequently, sift flour, cocoa, sugar, and salt into a large mixing bowl. This prevents lumps and ensures an even mixture. - Mix the Dough:
Afterward, add the yeast mixture and softened butter into the dry blend. Start kneading at low speed. Add a bit of warm water if the dough feels too stiff. Eventually, you want a smooth, slightly tacky dough. - Knead Thoroughly:
Indeed, knead for about 8–10 minutes. Basically, this develops gluten, giving the bread its shape and structure. If you knead by hand, push and fold until elastic. - First Rise:
Comparatively, allow the dough to rest in a warm spot until doubled in size. Usually, it takes about 1–2 hours, depending on room temperature. - Shape the Loaf:
Consequently, deflate the dough gently and shape it into a loaf. Place it into a greased pan. Cover it and let it rise again until puffy. - Bake:
Finally, bake at 350°F for about 30–40 minutes. Check doneness by tapping the bottom. A hollow sound indicates readiness. - Cool and Slice:
Eventually, let the bread cool completely before slicing. Meanwhile, the aroma fills your kitchen. Consequently, you can now enjoy the fruit of your labor.
Shaping and Proofing Your Chocolate Bread Recipe Loaf
Undoubtedly, shaping influences the bread’s final appearance. Therefore, gently stretch and tuck the dough to create surface tension. While working, ensure no large air pockets remain. Additionally, place the shaped loaf seam-side down in the pan.
Next, cover it and let it proof until it rises about an inch above the pan’s rim. Comparatively, a proper second rise ensures a soft texture. Particularly, do not rush this step. Eventually, proper proofing results in a tender and well structured crumb.
Marbled Chocolate Swirl Bread: A Deliciously Rich and Irresistible Treat

Ingredients
For the Vanilla Batter:
- 1 ½ cups all-purpose flour
- ¾ cup sugar
- 1 ½ tsp baking powder
- ¼ tsp salt
- ½ cup non-dairy milk (or regular milk)
- ⅓ cup oil (like vegetable or melted coconut oil)
- 1 tsp vanilla extract
For the Chocolate Batter:
- 1 cup all-purpose flour
- ¼ cup unsweetened cocoa powder
- ½ cup sugar
- 1 tsp baking powder
- ¼ tsp salt
- ½ cup non-dairy milk
- ⅓ cup oil
- ½ tsp vanilla extract
Mix-Ins & Topping:
- ½ cup mini chocolate chips (plus extra for topping)
Directions
- Preheat the Oven
- Preheat your oven to 350°F (175°C). Grease a 9×5-inch loaf pan or line it with parchment paper.
- Make the Vanilla Batter
- In a large bowl, whisk together the flour, sugar, baking powder, and salt.
- Add the non-dairy milk, oil, and vanilla extract. Stir until smooth, don’t overmix!
- Make the Chocolate Batter
- In another bowl, whisk together the flour, cocoa powder, sugar, baking powder, and salt.
- Pour in the non-dairy milk, oil, and vanilla. Mix until just combined.
- Layer and Swirl
- Pour half of the vanilla batter into the prepared loaf pan.
- Next, add half of the chocolate batter on top. Use a spoon to alternate dollops of each batter until they’re both used up.
- Take a skewer or butter knife and gently swirl the batters together for that marbled effect, be careful not to overdo it, or it will blend too much!
- Add Chocolate Chips
- Sprinkle a generous handful of mini chocolate chips on top.
- Bake to Perfection
- Place the pan in the oven and bake for 45-50 minutes or until a toothpick inserted into the center comes out clean (a few melted chocolate bits are totally fine!).
- Let the bread cool in the pan for 10 minutes before transferring it to a wire rack to cool completely.
- Slice & Serve
- Once cooled, slice it up and watch those gorgeous swirls steal the show!
Pro Tips
- For an even more indulgent loaf, drizzle melted chocolate over the cooled bread. Why not?
- Swap the chocolate chips for chopped nuts if you want a crunchy twist.
- Store leftovers in an airtight container at room temp for up to 3 days, or freeze slices for future cravings.
Mastering the Final Bake of the Chocolate Bread Recipe
Finally, the baking step transforms raw dough into a fragrant loaf. Accordingly, preheat the oven well. Subsequently, place the loaf on the center rack. Likewise, rotate halfway through baking for even browning. Moreover, avoid opening the oven door too often. This ensures consistent heat and full oven spring.
After baking, remove the loaf and let it rest. Eventually, the loaf cools, allowing flavors to develop fully. Indeed, patience pays off. Thus, you will relish every slice of your fresh chocolate bread.
Flavorful Variations to Explore

Moreover, exploring variations keeps baking fun and creative. Basically, you can add nuts, dried fruit, or spices. Comparatively, chopped hazelnuts deliver a Nutella-like flavor profile. Additionally, try mixing in chopped dark chocolate or bittersweet chips for a double-chocolate treat.
Possible Flavor Twists:
- Add orange zest and cranberries for brightness.
- Incorporate espresso powder for depth.
- Sprinkle cinnamon for warmth.
- Drizzle a chocolate glaze or dust with powdered sugar.
Because each variation adds unique complexity, test different ideas. Eventually, you’ll discover a signature twist that pleases your palate. Subsequently, your bread becomes a personal masterpiece.
Furthermore, you can adjust sweetness by adding honey or maple syrup. Consequently, these changes alter the bread’s character. Indeed, slight modifications can create entirely new loaves, keeping your baking endeavors fresh and exciting.
Pro Tips to Achieve Bakery-Quality Results
Achieving top-notch texture and flavor requires attention to detail. Likewise, adopting professional techniques can elevate your bread. Another key factor is timing. Basically, do not rush the process. Equally, pay attention to your dough’s texture.
Professional Suggestions:
- Measure Accurately: Use a kitchen scale for consistent results.
- Temperature Control: Keep ingredients and environment warm but not hot.
- Gluten Development: Knead thoroughly for better structure.
- Proper Hydration: Adjust water or milk for a supple dough.
- Patience in Proofing: Allow each rise its full time.
- Cool Completely: Slice only when the loaf is at room temperature.
Comparatively, these simple tips can make a significant difference. Consequently, your loaf will rival those found in artisan bakeries. Meanwhile, you gain confidence and skill with each loaf you produce.
Common Mistakes and How to Avoid Them
Unfortunately, even the best bakers encounter issues. However, learning from these problems helps you improve. For instance, a dense loaf might mean you did not knead enough. Alternatively, a bitter aftertaste could mean low-quality cocoa. Basically, each challenge teaches valuable lessons.
- Undermixed Dough: Consequently, your bread may lack structure. Knead more thoroughly.
- Overproofed Loaf: Eventually, the loaf collapses. Keep an eye on proofing times.
- Low-Quality Cocoa: Chiefly, switch to a better brand for deeper flavor.
- Incorrect Oven Temperature: Always use an oven thermometer to confirm accuracy.
Furthermore, adapt and refine your process. Indeed, each baking session brings new insights. Conversely, ignoring mistakes can prevent you from mastering the craft. Thus, embrace feedback and evolve your technique.
Perfect Pairings and Serving Ideas
Naturally, you might wonder how to serve chocolate bread. Generally, it tastes wonderful on its own. Yet, pairing it with coffee or tea elevates the experience. Similarly, serve it warm with a smear of butter or a delicate cream cheese spread. Additionally, top a slice with fresh berries or whipped cream for a dessert-like treat.
Serving Suggestions:
- Toasted with salted butter and a drizzle of honey
- Topped with mascarpone and raspberries
- Paired with a creamy latte or mocha
- Served as a dessert with vanilla ice cream
Altogether, the possibilities are endless. Likewise, consider using leftovers in bread puddings or French toast. Undoubtedly, this bread’s versatility makes it a pantry staple for chocolate lovers.
Storing and Preserving Freshness
Storing the bread properly maintains its flavor and texture. Moreover, wrap it in a clean, dry towel or place it in a breathable bread box. Comparatively, avoid sealing it in plastic, which can trap moisture and cause sogginess. Eventually, your bread remains fresh for a few days at room temperature.
If you want it to last longer, freeze it. Consequently, slice the loaf before freezing. That way, you can toast individual slices as needed. Meanwhile, always label and date your frozen goods. Undoubtedly, these steps ensure you enjoy fresh-tasting bread even after several weeks.
Health Benefits and Nutritional Profile
Although chocolate bread feels indulgent, it can still fit into a balanced diet. Generally, homemade bread avoids many preservatives found in store-bought loaves. Moreover, using quality ingredients allows you to control sugar and fat levels. Additionally, adding whole milk and butter provides nutrients like calcium and vitamin A.
However, moderation remains key. While the bread contains cocoa and sugar, it’s mainly a treat. Comparatively, eating it in small portions alongside nutrient-dense foods keeps your diet balanced. Likewise, pair it with fruits, nuts, or yogurt. Eventually, you can enjoy it guilt-free.
Experimenting with Different Flour Types
Furthermore, flour selection affects taste and texture. Chiefly, bread flour provides enough protein for strong gluten formation. Conversely, all-purpose flour can yield a softer loaf. Particularly, whole wheat flour adds a nutty flavor and extra fiber. Nonetheless, adjusting the liquid ratio becomes necessary when switching flours.
Experiment to find your preferred crumb structure. Consequently, if you want a lighter loaf, stick to bread flour. Meanwhile, if you crave a heartier taste, blend in whole wheat or spelt. Eventually, the right flour balances taste, nutrition, and texture.
Working with Yeast and Dough Fermentation
Indeed, yeast lies at the heart of bread-making. Initially, yeast consumes sugars and releases carbon dioxide. Consequently, this gas inflates the dough, creating rise. Moreover, controlling fermentation time affects flavor development. A longer, slower rise often leads to deeper complexity.
Because temperature influences yeast activity, keep the dough in a warm spot. Conversely, too hot an environment can kill the yeast. Additionally, always check expiration dates on yeast packets. Undoubtedly, fresh yeast ensures proper fermentation. Thus, handle yeast carefully to guarantee a perfect loaf.
Enhancing Flavor with Additional Ingredients
Because chocolate pairs well with many flavors, consider adding extras. Initially, test small amounts to avoid overpowering the base flavor. Eventually, you might add vanilla extract, almond essence, or even a pinch of chili flakes. In fact, mild heat can highlight cocoa’s depth.
Comparatively, toasted nuts like hazelnuts or almonds introduce crunch and richness. Furthermore, dried cherries or apricots offer tangy contrast. Meanwhile, caramel bits or white chocolate chunks add sweetness. Thus, incorporate new flavors mindfully. Another time, adjust the ingredient balance and enjoy a personalized loaf.
Embracing Seasonal Themes and Holidays
Altogether, adapting this bread for different occasions adds charm. Specifically, shape the dough into festive forms for holidays. For Easter, form braided loaves. Eventually, add pastel-colored sprinkles for a cheerful appearance. Meanwhile, during winter holidays, incorporate peppermint bits or nutmeg.
Furthermore, serve warm chocolate bread at Halloween parties. Particularly, pair it with pumpkin-based spreads. Consequently, guests appreciate your creativity. Thus, your chocolate bread recipe becomes a celebration centerpiece.
Troubleshooting Dough Consistency
Eventually, every baker encounters sticky or dry dough. However, a few adjustments help achieve the right consistency. If the dough feels too sticky, add a tablespoon of flour at a time. Conversely, if it feels dry and crumbly, splash a bit of warm water or milk.
Additionally, slight variations in humidity or flour brand affect dough texture. Consequently, remain flexible and observant. Indeed, developing this instinct takes practice. Ultimately, your dough-handling skills improve over time, leading to perfect loaves.
Elevating Crust and Crumb Quality
Another way to improve this bread involves focusing on crust and crumb. Basically, a crisp exterior and moist interior define a remarkable loaf. Consequently, proper proofing and baking times matter. Additionally, try using a baking stone or adding steam to the oven. This encourages better crust formation.
Furthermore, scoring the dough before baking can help release gas and guide oven spring. Thus, experiment with different methods to achieve the crust and crumb you desire. Eventually, small details yield impressive results.
Creating a Signature Chocolate Bread Recipe Tradition
Ultimately, baking this chocolate bread recipe can become a family tradition. Indeed, children enjoy helping shape the dough. Meanwhile, adults appreciate the comforting aroma. Consequently, over time, you might develop a signature version that becomes a staple at gatherings.
Moreover, these traditions encourage future generations to embrace home baking. Therefore, share your knowledge and experience. Eventually, friends and family will anticipate the arrival of your chocolate bread at every special occasion. Thus, a simple recipe transforms into cherished memories.
Frequently Asked Questions
Does chocolate affect yeast?
Indeed, chocolate introduces acidity and fats that can impact yeast activity. However, if you use quality cocoa and balance the dough’s hydration, the yeast should still perform well. Basically, the key is to ensure the cocoa is well incorporated and that the yeast is fresh. Consequently, this ensures a good rise and proper loaf structure.
What are the hardest breads to make?
Conversely, breads with complex shaping or lengthy fermentation can be challenging. Sourdoughs and artisan loaves require skill and experience. Meanwhile, laminated breads like croissants demand patience. Comparatively, this chocolate bread recipe remains more approachable. Nevertheless, mastering difficult loaves builds confidence over time.
How long is chocolate bread good for?
Generally, it stays fresh for about 2–3 days at room temperature. Store it properly to prevent dryness or mold. Eventually, freeze any leftovers for up to 3 months. Meanwhile, thaw slices as needed for fresh-tasting bread anytime.
Why do you put milk instead of water in bread?
Because milk adds richness and tenderness, it yields a softer crumb and richer flavor profile. Additionally, milk’s natural sugars enhance browning. Consequently, replacing water with milk creates a more indulgent loaf. Thus, the bread feels luxurious and comforting.
